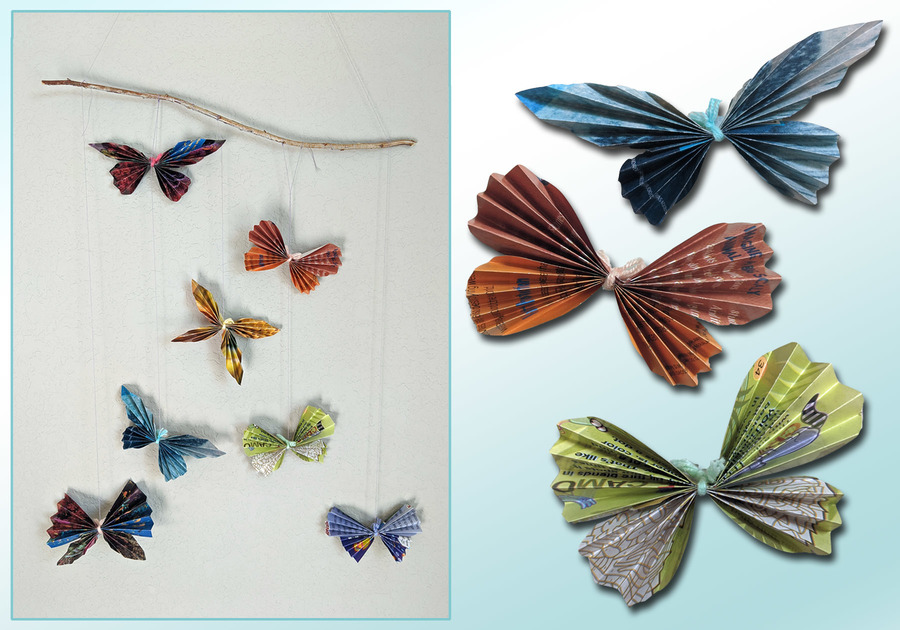
What do you do with your magazines and catalogs after you've read them? Perhaps you toss them straight into your recycle bin, or maybe you're more like me and have a growing stack with an invisible label that reads, "someday I'll need these." If you resonate with the latter, we've got a craft for you: Recycled Magazine Butterflies.
Not only are butterflies physically beautiful but they often symbolize transformation, growth, or new beginnings. We'll walk you through the steps of creating your own recycled magazine butterflies and leave you with inspiration for various ways to incorporate them into your own home.

Part I: Recycled Magazine Butterflies
Supplies:
- Magazines/Catalogs
- Scissors
- Yarn
Directions:
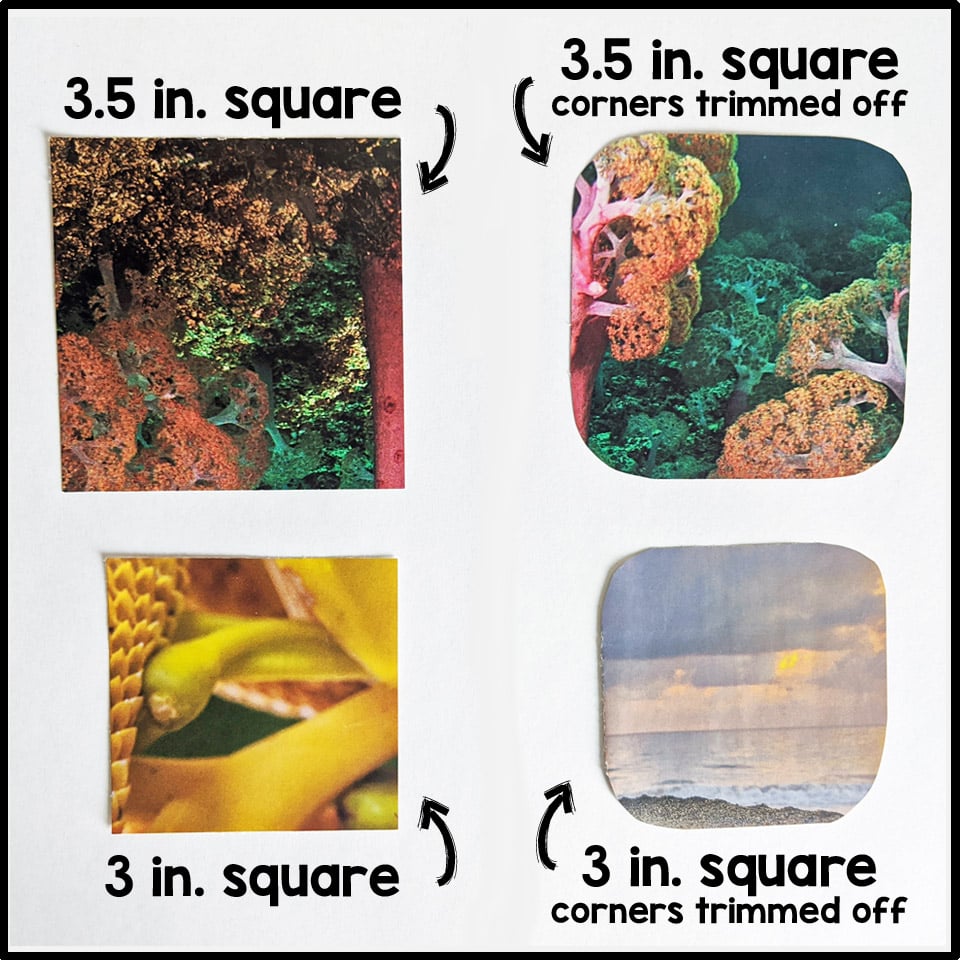
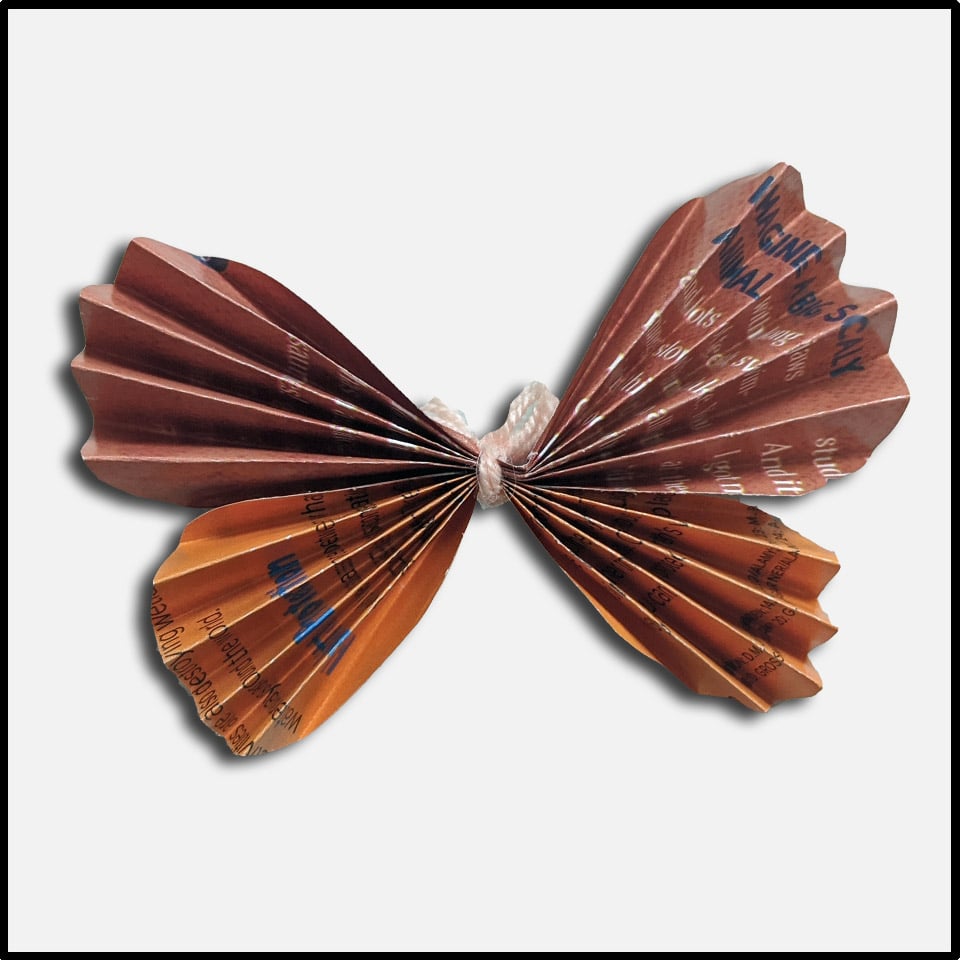
- Prepare your paper by cutting magazine pages into squares. We used 3.5" squares for upper wings and 3" squares for lower wings.
- For a sharper look, keep the square intact. To soften the look, round the squares by trimming off the corners. Refer to the image below.
3. Start folding. We used two different folding methods to create our butterflies- a straight accordion fold and a diagonal accordion fold. Refer to the image below to visualize these methods.
Macaroni Kid Tip: Mix and match techniques to create a variety of designs.
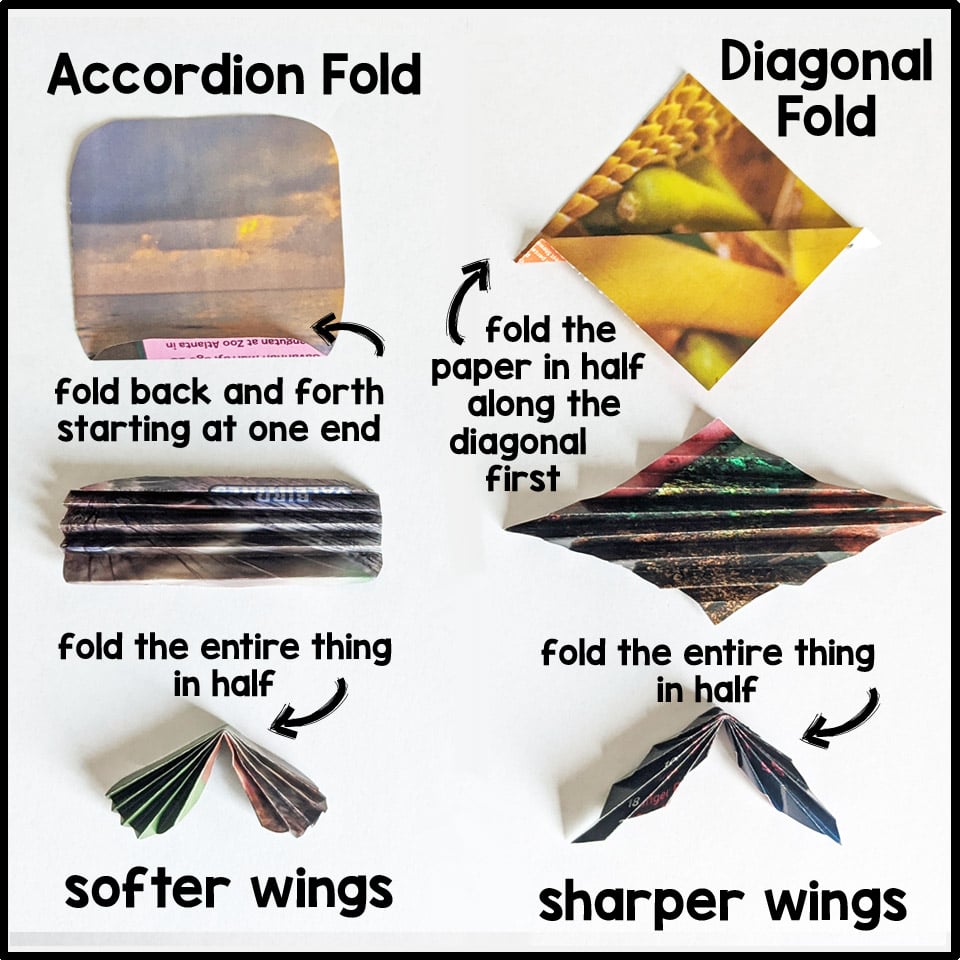
4. After the papers have been folded like an accordion, fold one more time in the center to shape the upper or lower set of wings.
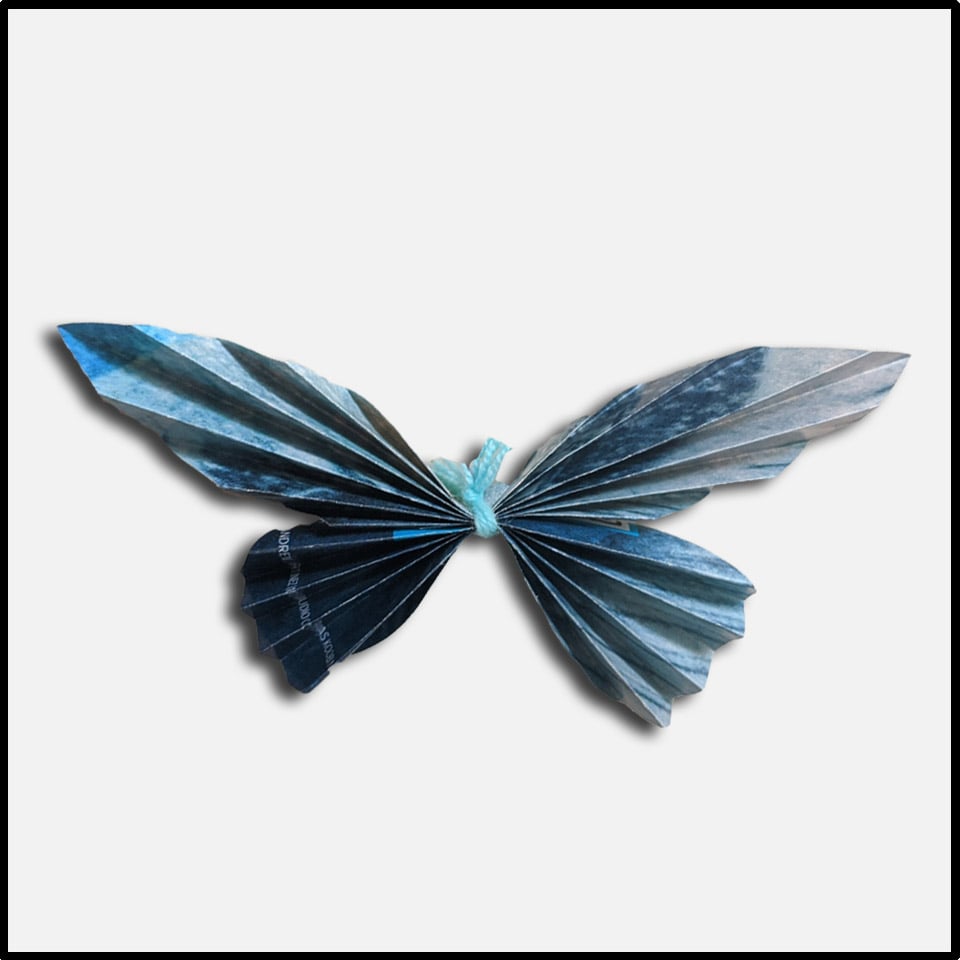
5. Once you have a set of both upper and lower wings, attach them together with a piece of yarn. If you make the knot on the top of the top wings, the yarn will look like antennae once it is snipped.
 |  |
MACARONI KID TIP: Did you know that there are ~17,500 species of butterflies in the world? Play around with colors, sizes, and folding techniques to create your own distinct butterflies.

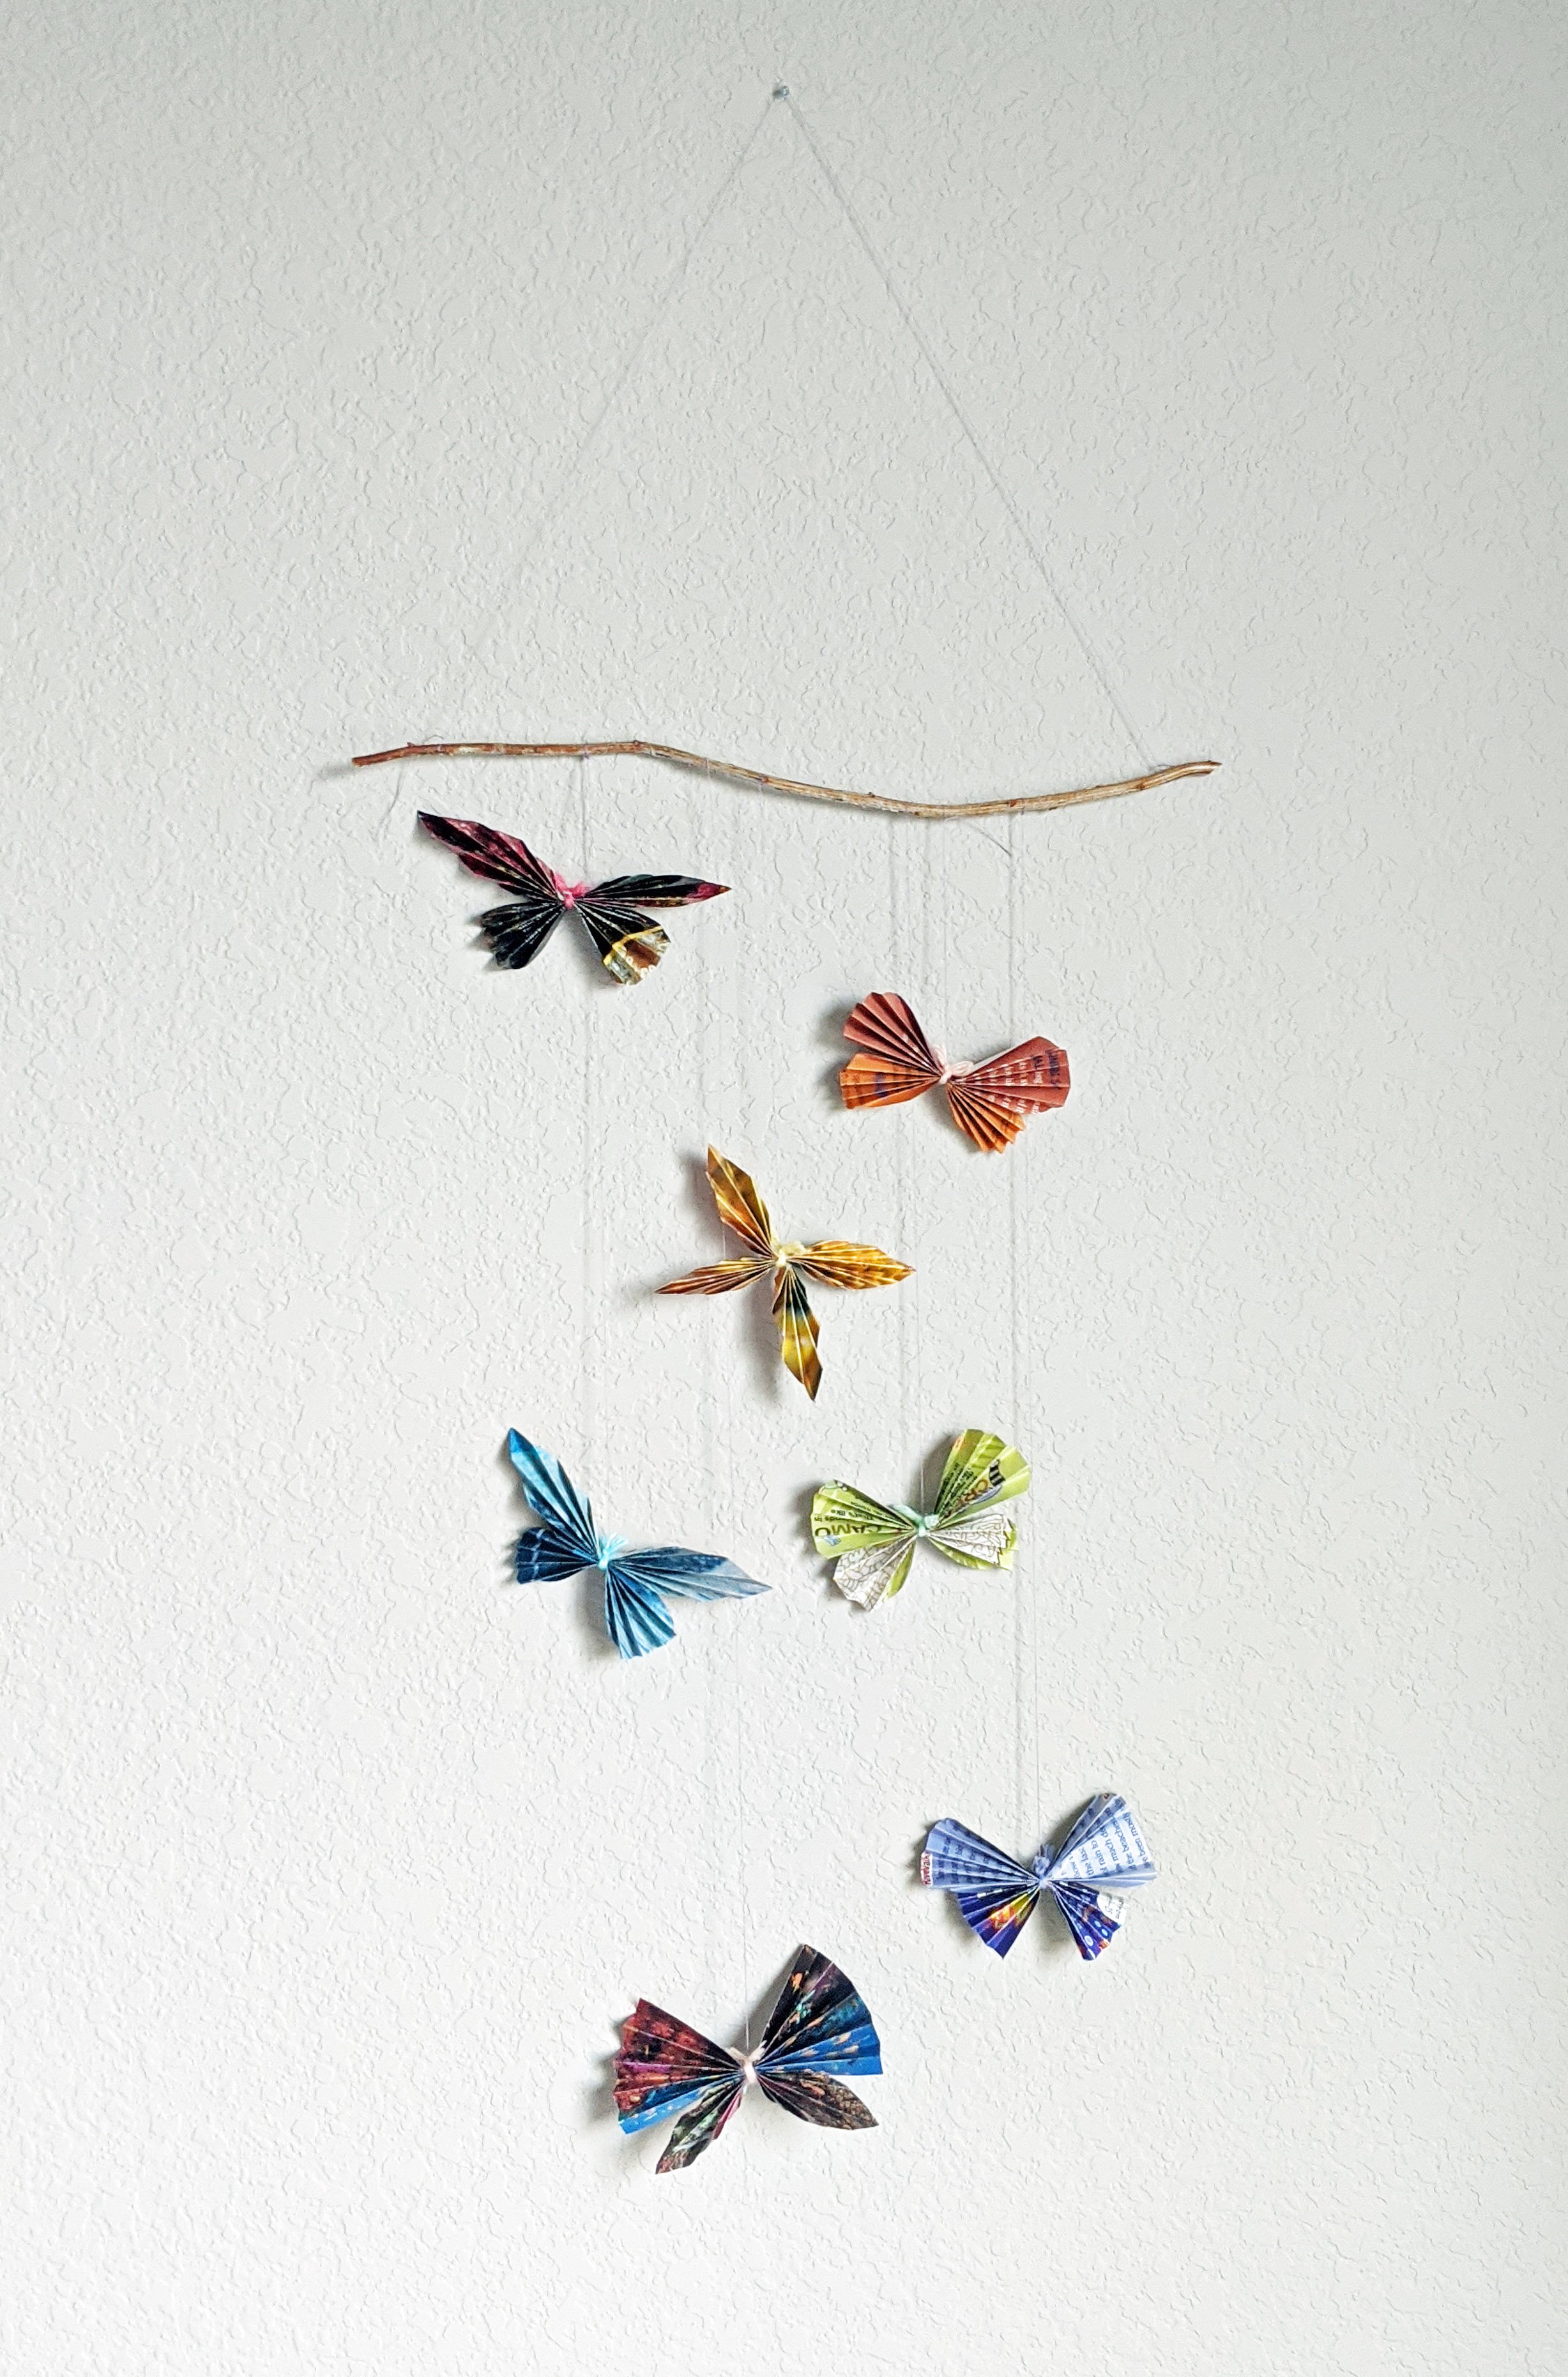
Part II: Hanging Support
Supplies:
- Stick
- String (fishing line, thread, or yarn will work)
- Nail
Directions:
- Tie string at various lengths from the butterflies to the stick.
- Once you get a feel for the size, find a suitable place in your home to hang the artwork. Secure a nail into the wall at a point higher than where the artwork will be displayed.
- Tie a string to both ends of the stick to form a triangle when the center of the string is balanced on the nail.
Other Ways to Use These Butterflies
- Tie them to a string to create gift tags.
- Secure them with a pipe cleaner to create Christmas tree ornaments.
- Make them in miniature sizes to embellish cards or picture frames.
- Add them to a stick to jazz up your indoor potted plants.
- String them together to make a garland.
For more family fun related to backyard pollinators, visit:
 |  |  |